How to Automate Pricing Updates Across Your Shopify Store
Automating pricing updates means automating the workflow around the decision, not the decision itself: exporting sales data on a schedule, feeding it to a pricing model, pushing approved prices back into Shopify through the Admin API, and notifying your team when it's done. The analysis itself takes minutes. Most of the time merchants lose is in the manual steps around it, exporting CSVs, cross-referencing cost sheets, editing product pages one by one.
Key Takeaways
- Pricing is really three separate jobs: data collection, analysis, and execution. Most merchants automate the middle one and do the other two by hand.
- Shopify Flow and third-party connectors can automate the data export step so sales history lands in a consistent format without manual clicking.
- Pushing recommended prices back into Shopify has three options, the bulk CSV editor, Flow plus tags, or the Admin API, with the API being the only one that scales cleanly to large catalogs.
- Confidence scores matter for automation specifically: only push high-confidence recommendations automatically, route low-confidence ones to a manual review queue.
- Automate the plumbing before you trust the model, not before. Run recommendations manually a few times first so you know what a good one looks like.
The Pricing Workflow Has Three Parts
Think of pricing as three distinct jobs: data collection, pulling sales history, cost data, and competitor prices into one place; analysis, running that data through an elasticity model to find the profit-maximizing price for each SKU; and execution, pushing the new prices back into your store, updating internal reports, and notifying your team. Most merchants automate the second part, or let a tool handle it, and do the first and third by hand. That's where the time disappears.
| Step | What it involves | Typically automated? |
|---|---|---|
| 1. Data collection | Sales history, cost data, competitor prices | Rarely |
| 2. Analysis | Elasticity model, confidence scoring, price recommendation | Usually, by the pricing tool |
| 3. Execution | Updating product prices, reporting, team notification | Rarely |
Step 1: Automate the Data Export
Shopify lets you export order history as a CSV, but doing it manually every week gets old fast. Shopify Flow can trigger an export on a schedule, and third-party connectors (Mesa, Alloy, Zapier) can route that file to Google Sheets, email, or a cloud folder automatically. The goal is simple: your sales data lands in a consistent format, in a consistent place, without you clicking "Export."
If you also track competitor prices, that's a second data stream worth automating. Competitor sites change layouts, block scrapers, and rotate pricing tiers, so scheduled browser automation is generally more reliable than a one-off script. WebRun's guide to integrating browser automation with n8n walks through setting up scheduled competitor price checks, including how to handle timeouts and poll for results when a task takes longer than expected.
Step 2: Feed the Data Into Your Pricing Model
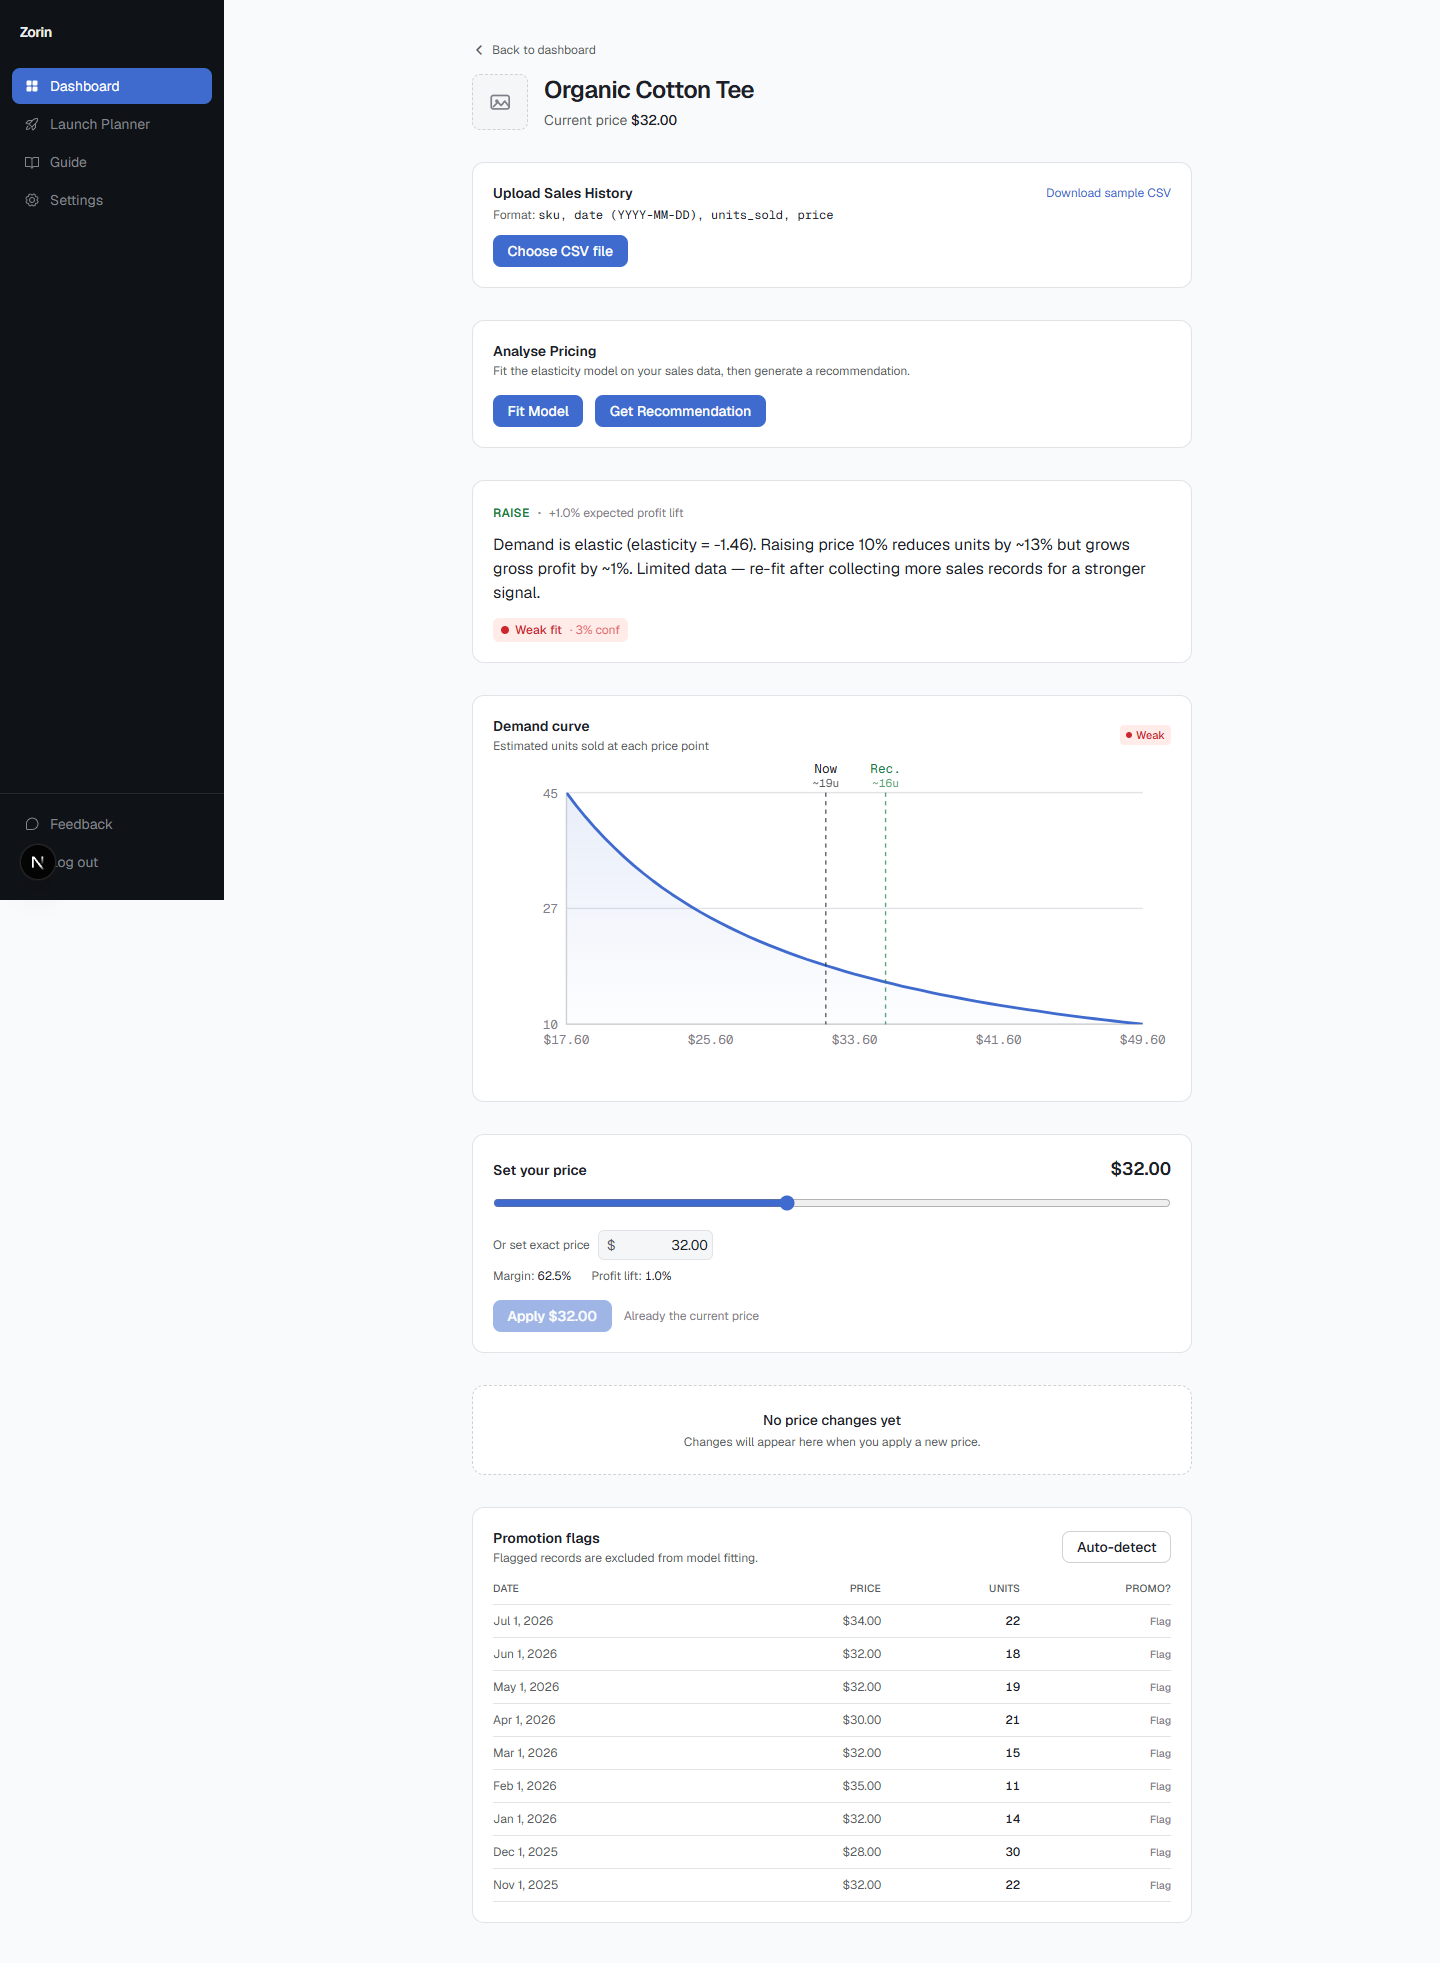
Once your data export is automated, the next step is connecting it to whatever runs your pricing analysis. With Zorin, you upload a CSV of past transactions and the demand model fits automatically, returning a recommended price, expected profit lift, and confidence score for each product. The whole process takes about five minutes from upload to recommendation, the same elasticity coefficient that would otherwise take a spreadsheet and a statistics background to calculate by hand.
The key detail is that your export format needs to match what your pricing tool expects. Zorin parses quantities, prices, and dates from your CSV. If your automated export includes extra columns or different headers, add a transformation step, a simple Google Sheets formula or a Zapier formatter, to clean the file before it hits the model.
Step 3: Push Price Changes Back Into Shopify
This is where most workflows fall apart. You have a list of recommended prices. Now what?
- Option A, Shopify's bulk editor: download your recommendations, format them as a Shopify product CSV, and upload via the admin. Semi-manual, but faster than editing products one by one.
- Option B, Shopify Flow plus tags: tag products that need price changes, then use a Flow to apply specific price rules based on tags. Works for simple adjustments but gets messy with per-SKU recommendations.
- Option C, the Shopify Admin API: with a no-code automation tool like Make or n8n, connect your pricing output directly to the Shopify API. The automation reads each row of your recommendation file, calls the API to update the product variant price, and logs the change. No manual uploading.
Option C is the most reliable for stores with large catalogs. Once it runs, every recommended price is live in your store within minutes, and you have a log of exactly what changed, which matters if you're pricing an entire catalog rather than a handful of products.
Step 4: Close the Loop With Notifications
Price changes affect more than just the product page. Your team needs to know what moved and why. A few things worth automating after prices update:
- Slack or email alert listing every SKU that changed, the old price, and the new price.
- Margin report recalculated with the new prices and your current cost of goods.
- Calendar reminder to review results in 7 to 14 days, once enough sales data accumulates to measure the impact.
These are simple automations in any workflow tool. The point is to avoid the scenario where prices changed three weeks ago and nobody remembers which ones or why.
What This Looks Like End to End
A fully automated pricing workflow runs on a weekly or biweekly cycle. Monday morning, your sales data and competitor prices are automatically exported and cleaned. You upload the data to your pricing model, or it pulls automatically, and five minutes later you have recommendations with confidence scores. You review the recommendations, approve the ones above your confidence threshold, and hit go. The automation pushes approved prices to Shopify, logs every change, and pings your team. Two weeks later, you review performance against the old prices, which is also a good moment to revisit how often you're actually changing prices versus how often the model has something worth acting on.
The human stays in the loop for the decision. Everything else runs without them.
Where Merchants Get Stuck
Two common mistakes show up with pricing automation. The first is automating too early: if you haven't run your pricing model manually a few times, you don't yet know what a good recommendation looks like. Automate the workflow after you trust the output, not before.
The second is ignoring confidence scores. Not every recommendation is equally strong. A product with an elasticity R-squared of 0.91 is telling you something reliable. A product with sparse sales data and low confidence is a guess. Build your automation to filter on confidence, so only strong recommendations get pushed automatically and weaker ones go to a review queue.
The pricing decision is the valuable part. Everything around it, the exports, the formatting, the uploads, the notifications, is plumbing. Automate the plumbing, keep your hands on the lever. Connect your sales history to see the recommendation side of this workflow running on your own catalog.
Frequently Asked Questions
Can I fully automate Shopify pricing updates without a developer?
Yes. No-code tools like Shopify Flow, Zapier, Make, and n8n can handle the data export and price-push steps without custom code, connecting directly to the Shopify Admin API.
What's the best way to push bulk price changes into Shopify?
For large catalogs, connecting your pricing output to the Shopify Admin API through a no-code automation tool is the most reliable option. It updates every variant directly and logs the change, unlike the bulk CSV editor or Flow-plus-tags approaches, which get harder to manage at scale.
Should I automate every price change a model recommends?
No. Filter on confidence score first. High-confidence recommendations are reasonable to push automatically, while low-confidence ones, usually from products with sparse sales history, should go to a manual review queue instead.
How often should an automated pricing workflow run?
Weekly or biweekly is typical, enough time for meaningful sales data to accumulate between cycles without letting stale recommendations sit unused.
What format does my sales data need to be in before feeding it to a pricing model?
It needs to match what the tool expects, typically quantities, prices, and dates per transaction. If your automated export includes extra columns or different headers, add a cleanup step before the file reaches the model.
Do I need to automate competitor price tracking too?
Only if your pricing process uses it. Scheduled browser automation is more reliable than manual checks for this, since competitor sites frequently change layouts and block scrapers.
What's the risk of automating pricing before trusting the model?
You won't yet recognize a bad recommendation when you see one. Run the model manually a few times first, get a feel for what a reasonable output looks like, and automate the surrounding workflow once you trust the recommendations themselves.
Getting a pricing recommendation is one thing. Acting on it across 200 SKUs is another, and that gap is almost entirely a plumbing problem, not a modeling one. Automate the data export, the price push, and the notifications, and keep the actual pricing decision, and a healthy dose of skepticism toward low-confidence recommendations, in human hands.
Written by Dexter
Dexter is part of the team at Zorin, building tools that help ecommerce merchants price with data instead of guesswork.